Why TCNA Standards Matter: What Every Arizona Homeowner Should Know Before Hiring a Tile Contractor
You are about to spend thousands of dollars on a tile project. Maybe it is a walk-in shower you have been dreaming about. Maybe it is new flooring for your entire first floor. Maybe it is a kitchen backsplash to finish off a remodel.
Whatever the project, you are probably comparing quotes, looking at portfolios, and reading Google reviews. Those are all good steps. But there is one question most homeowners never think to ask -- and it is the single most important factor in whether your tile lasts five years or fifty.
That question: Does your contractor follow TCNA standards?
If you have never heard of TCNA, you are not alone. Most homeowners have no idea this organization exists. But every professional tile installer knows about it -- or at least they should. Understanding what TCNA is and why it matters will give you the knowledge to separate qualified contractors from the ones who are winging it.
What Is TCNA?
TCNA stands for the Tile Council of North America. Founded in 1945, it is the organization that establishes the standards and guidelines for every aspect of tile installation in the United States and Canada.
Their primary publication is the TCNA Handbook for Ceramic, Glass, and Stone Tile Installation. In the tile industry, this handbook is the definitive reference. It covers everything from what substrates are acceptable for tile to how thick your waterproofing membrane needs to be to how wide your grout joints should be for a given tile size.
Think of it this way: just like building codes tell electricians how to wire a house safely, the TCNA Handbook tells tile installers how to install tile correctly. The difference is that while electrical codes are enforced by inspectors, tile installation standards are largely self-enforced. That means it is up to the contractor to follow them -- and up to you, the homeowner, to ask whether they do.
What Is NTCA?
You will often see TCNA mentioned alongside NTCA, which stands for the National Tile Contractors Association. While TCNA sets the standards, NTCA is the trade organization that represents professional tile contractors and works to educate the industry on best practices.
NTCA membership is not a requirement to do tile work. But contractors who are familiar with NTCA and follow their training resources tend to be more invested in doing quality work. NTCA publishes technical articles, offers certification programs, and provides reference materials that help contractors stay current with evolving installation methods and materials.
Together, TCNA and NTCA form the backbone of professional tile installation standards in America. If your contractor has never heard of either organization, that is a significant red flag.
Why It Matters for Your Project
TCNA standards are not arbitrary rules someone made up. Each guideline exists because decades of field experience and testing have proven that cutting corners in these specific areas leads to failures. Here are the standards that directly affect whether your tile project holds up or falls apart.
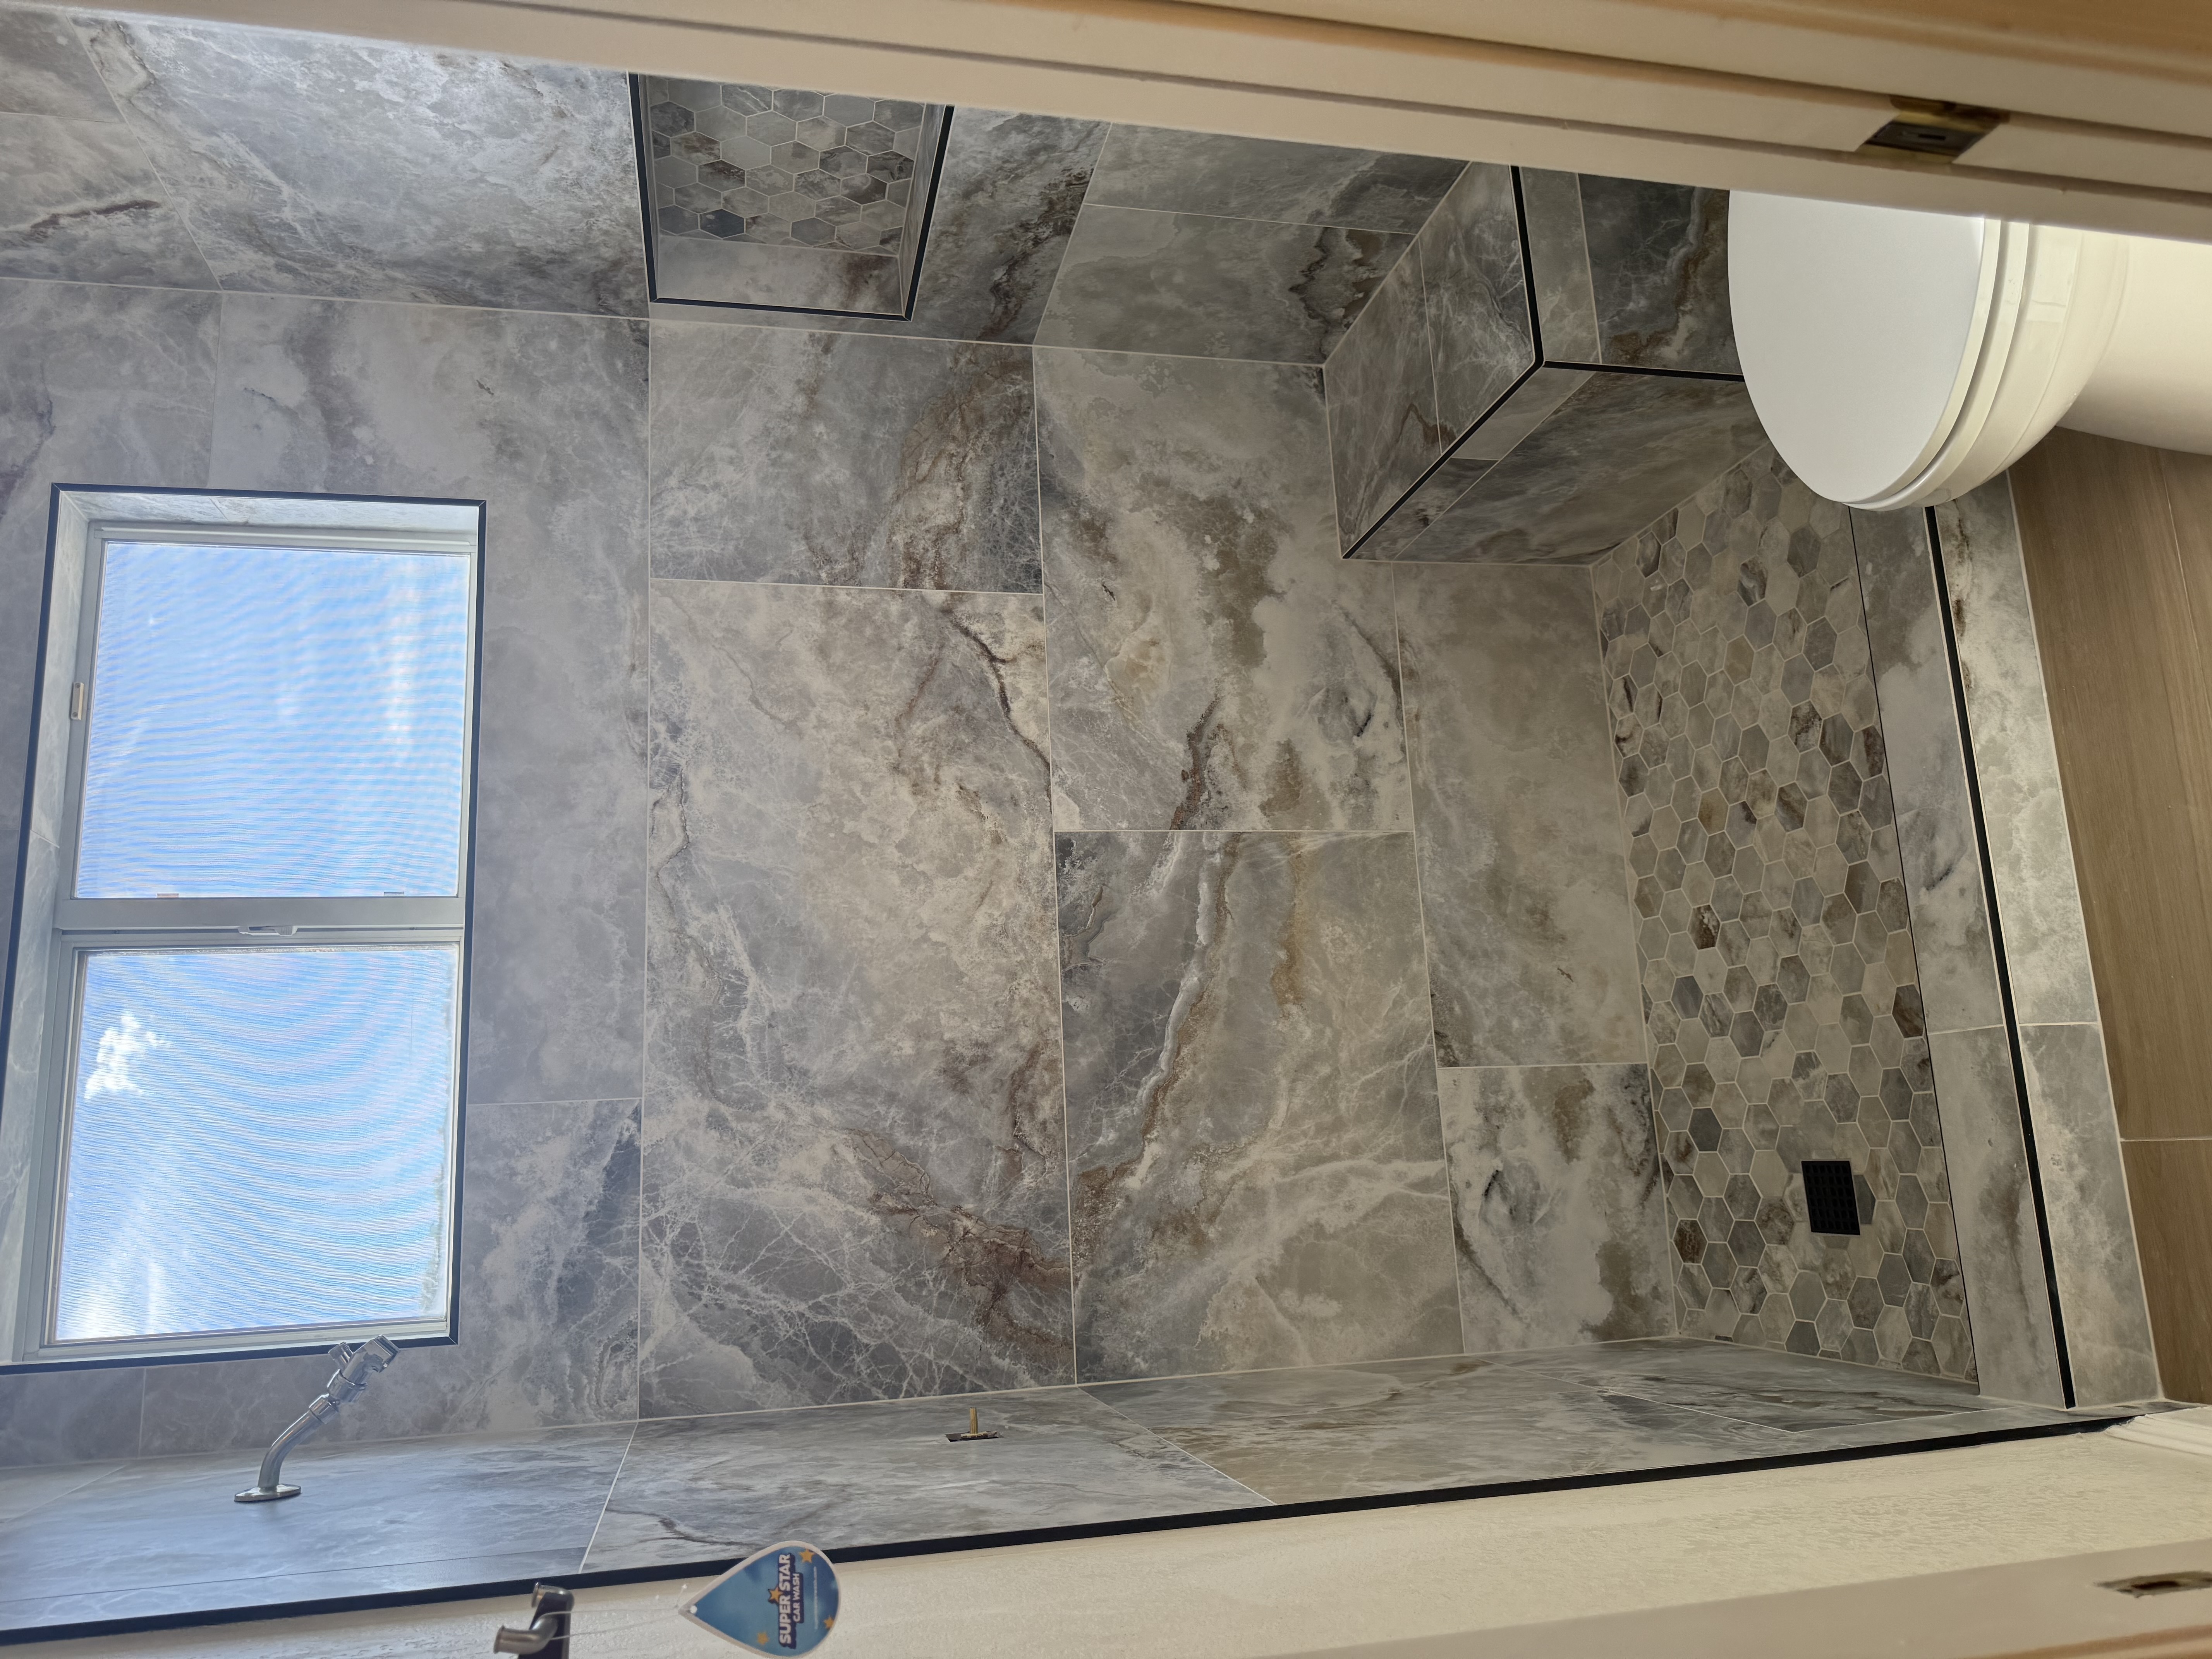
Waterproofing Requirements for Showers
This is where the most costly mistakes happen. TCNA standards require that every shower assembly include a waterproof membrane system. That means every surface that contacts water -- the shower pan, the walls, the curb, the bench, the niche -- needs to be fully waterproofed before a single tile goes down.
The standards specify requirements for:
- Shower pan slope: The substrate beneath your tile must slope toward the drain at a minimum of 1/4 inch per foot. This ensures water flows to the drain and does not pool on the floor.
- Membrane coverage: The waterproofing membrane must cover the entire wet area continuously, with all seams properly sealed. This includes transitions at corners, at the curb, and around the drain.
- Drain integration: The drain must be bonded to the membrane to create a continuous waterproof system. A drain sitting on top of a membrane without proper bonding is a ticking time bomb.
- Curb waterproofing: The shower curb must be wrapped in membrane on all three exposed sides -- top, inside face, and outside face -- to prevent water from wicking through.
At Level Up Tile, we use Schluter Kerdi membrane on every shower pan with a FloFX drain, and HydroBlok foam boards on all walls -- a fully waterproof system that eliminates the need for additional membranes or liquid waterproofing. We're experts in multiple waterproofing systems and only use the ones we've tested and trust. We verify the system is 100% waterproof before any tile is set. This is not optional -- it is the standard.
Substrate Preparation
Here is something many homeowners do not know: you cannot tile directly over standard drywall in a wet area. Regular drywall will absorb moisture over time, swell, grow mold, and eventually disintegrate -- taking your tile with it.
TCNA standards require specific substrates depending on the application:
- Shower walls: Cement backer board (like Durock or HardieBacker), gypsum-based board (like DensShield), foam backer board (like HydroBlok or Kerdi Board), or a waterproofing membrane applied over an approved substrate. Never standard drywall.
- Shower floors: A mortar bed with proper slope, or a foam pan system like Kerdi Shower-ST, with a bonded waterproof membrane.
- Floors over concrete: The concrete must be clean, structurally sound, and free of contaminants. Cracks require crack isolation membrane. Uneven surfaces need grinding or self-leveling compound.
- Floors over plywood: The subfloor must meet minimum thickness and deflection requirements. Most installations require a minimum of 1-1/8 inch total subfloor thickness to prevent flex that cracks tile and grout.
Substrate prep is the part of tile installation that nobody sees when the job is done. But it is the foundation everything else depends on. Skip it, and even the most beautiful tile will fail.
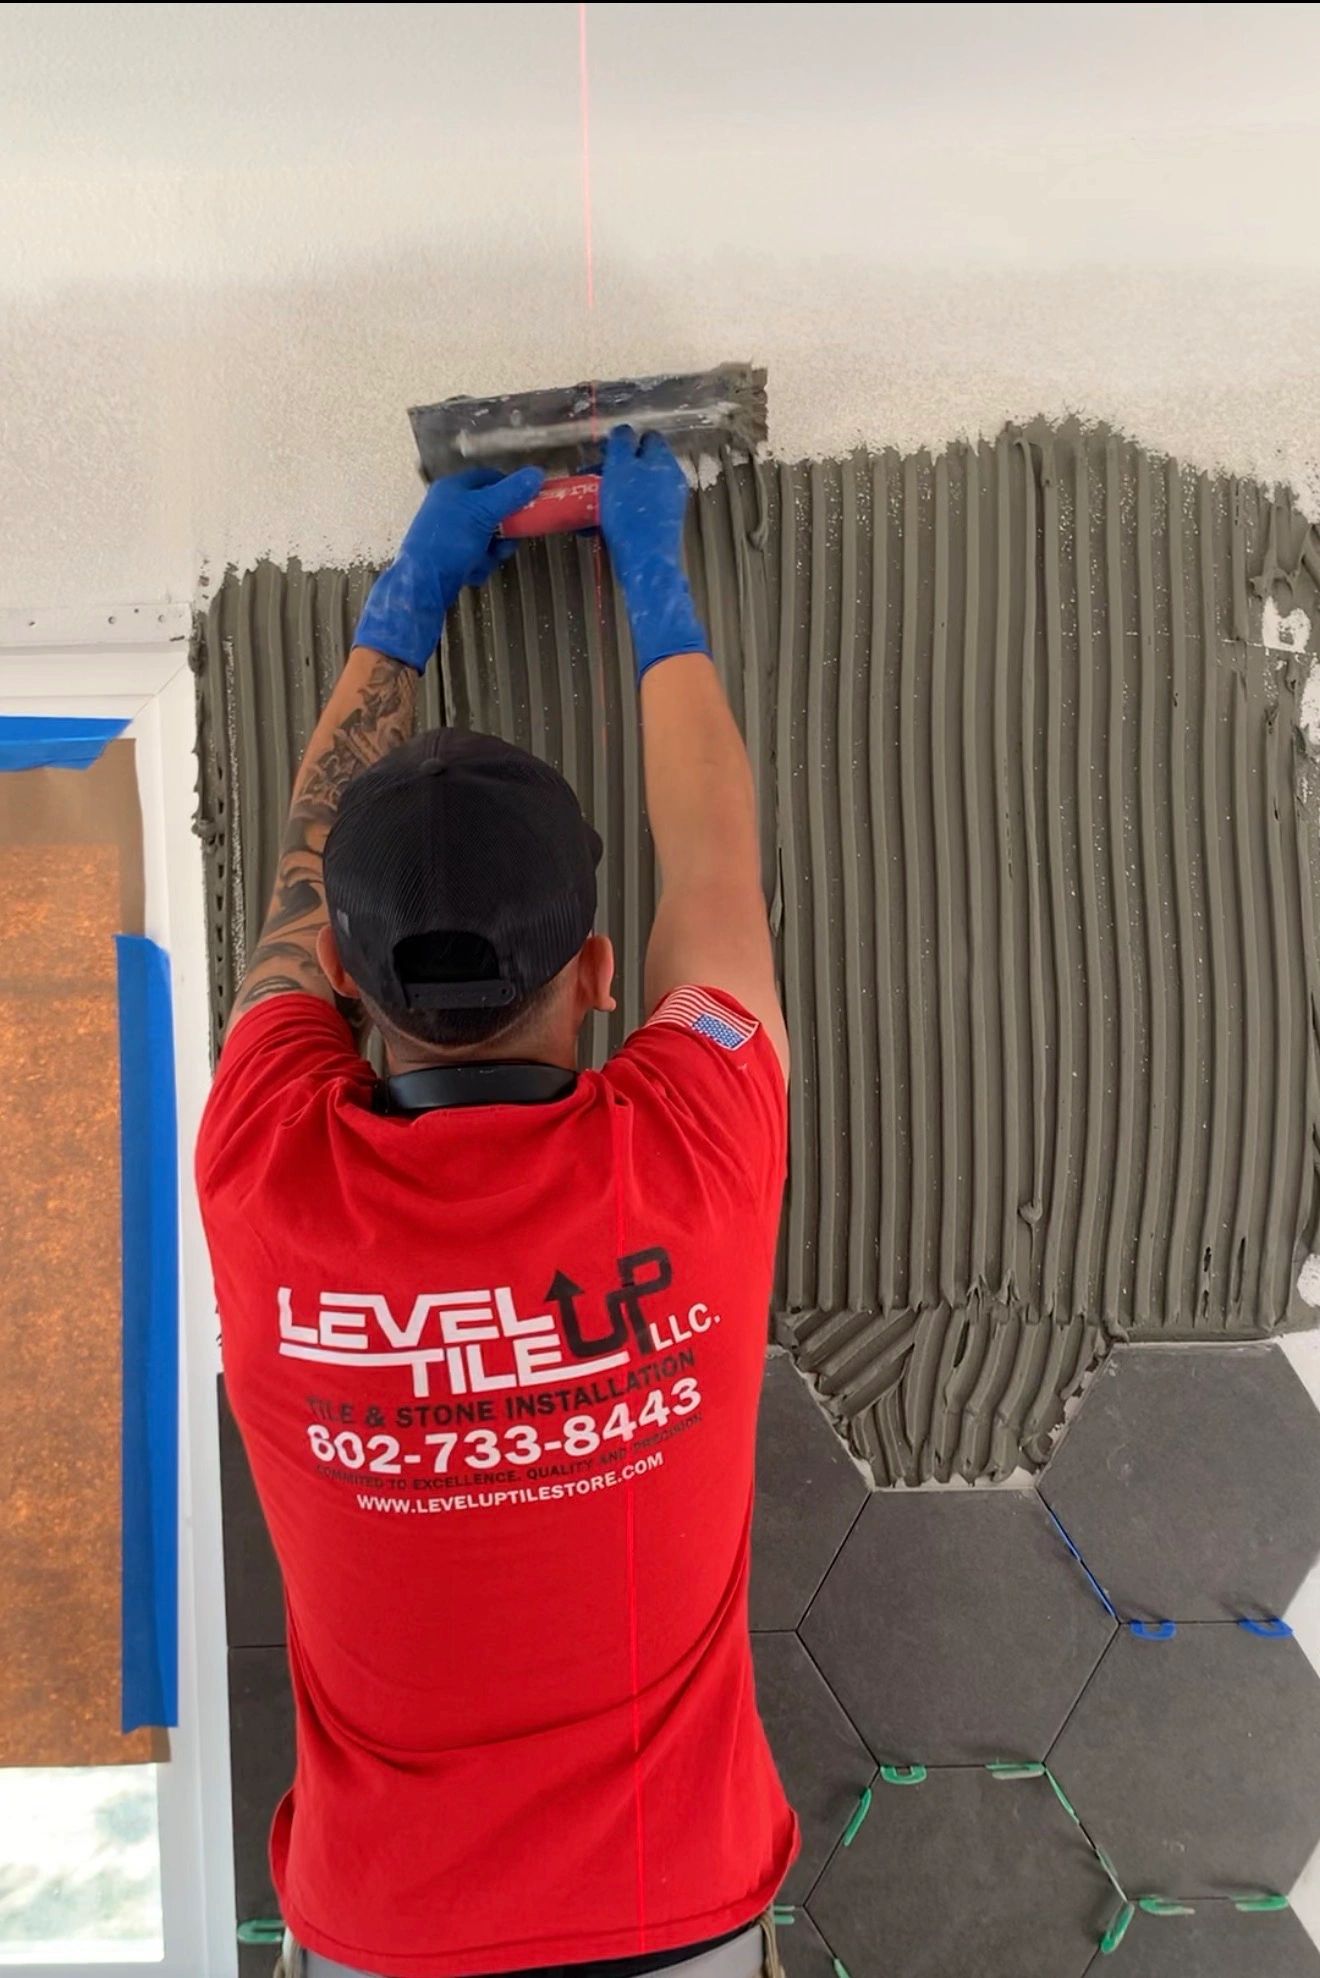
Proper Thinset Coverage
Thinset mortar is the adhesive that bonds tile to the substrate. TCNA standards are very specific about coverage requirements:
- Dry areas (floors and walls): Minimum 80% thinset coverage on the back of the tile.
- Wet areas and exterior installations: Minimum 95% thinset coverage.
How do you achieve 95% coverage? Through a technique called back-buttering. This means applying thinset to both the substrate and the back of the tile, then pressing the tile into place. For large-format tiles (anything over 15 inches on any side), back-buttering is not a nice-to-have -- it is an industry requirement.
When thinset coverage is inadequate, you get hollow spots behind the tile -- air pockets where there is no adhesive. These voids create weak points. In a shower, water can collect in these pockets and promote mold growth. On a floor, heavy furniture or foot traffic over a hollow spot can crack the tile.
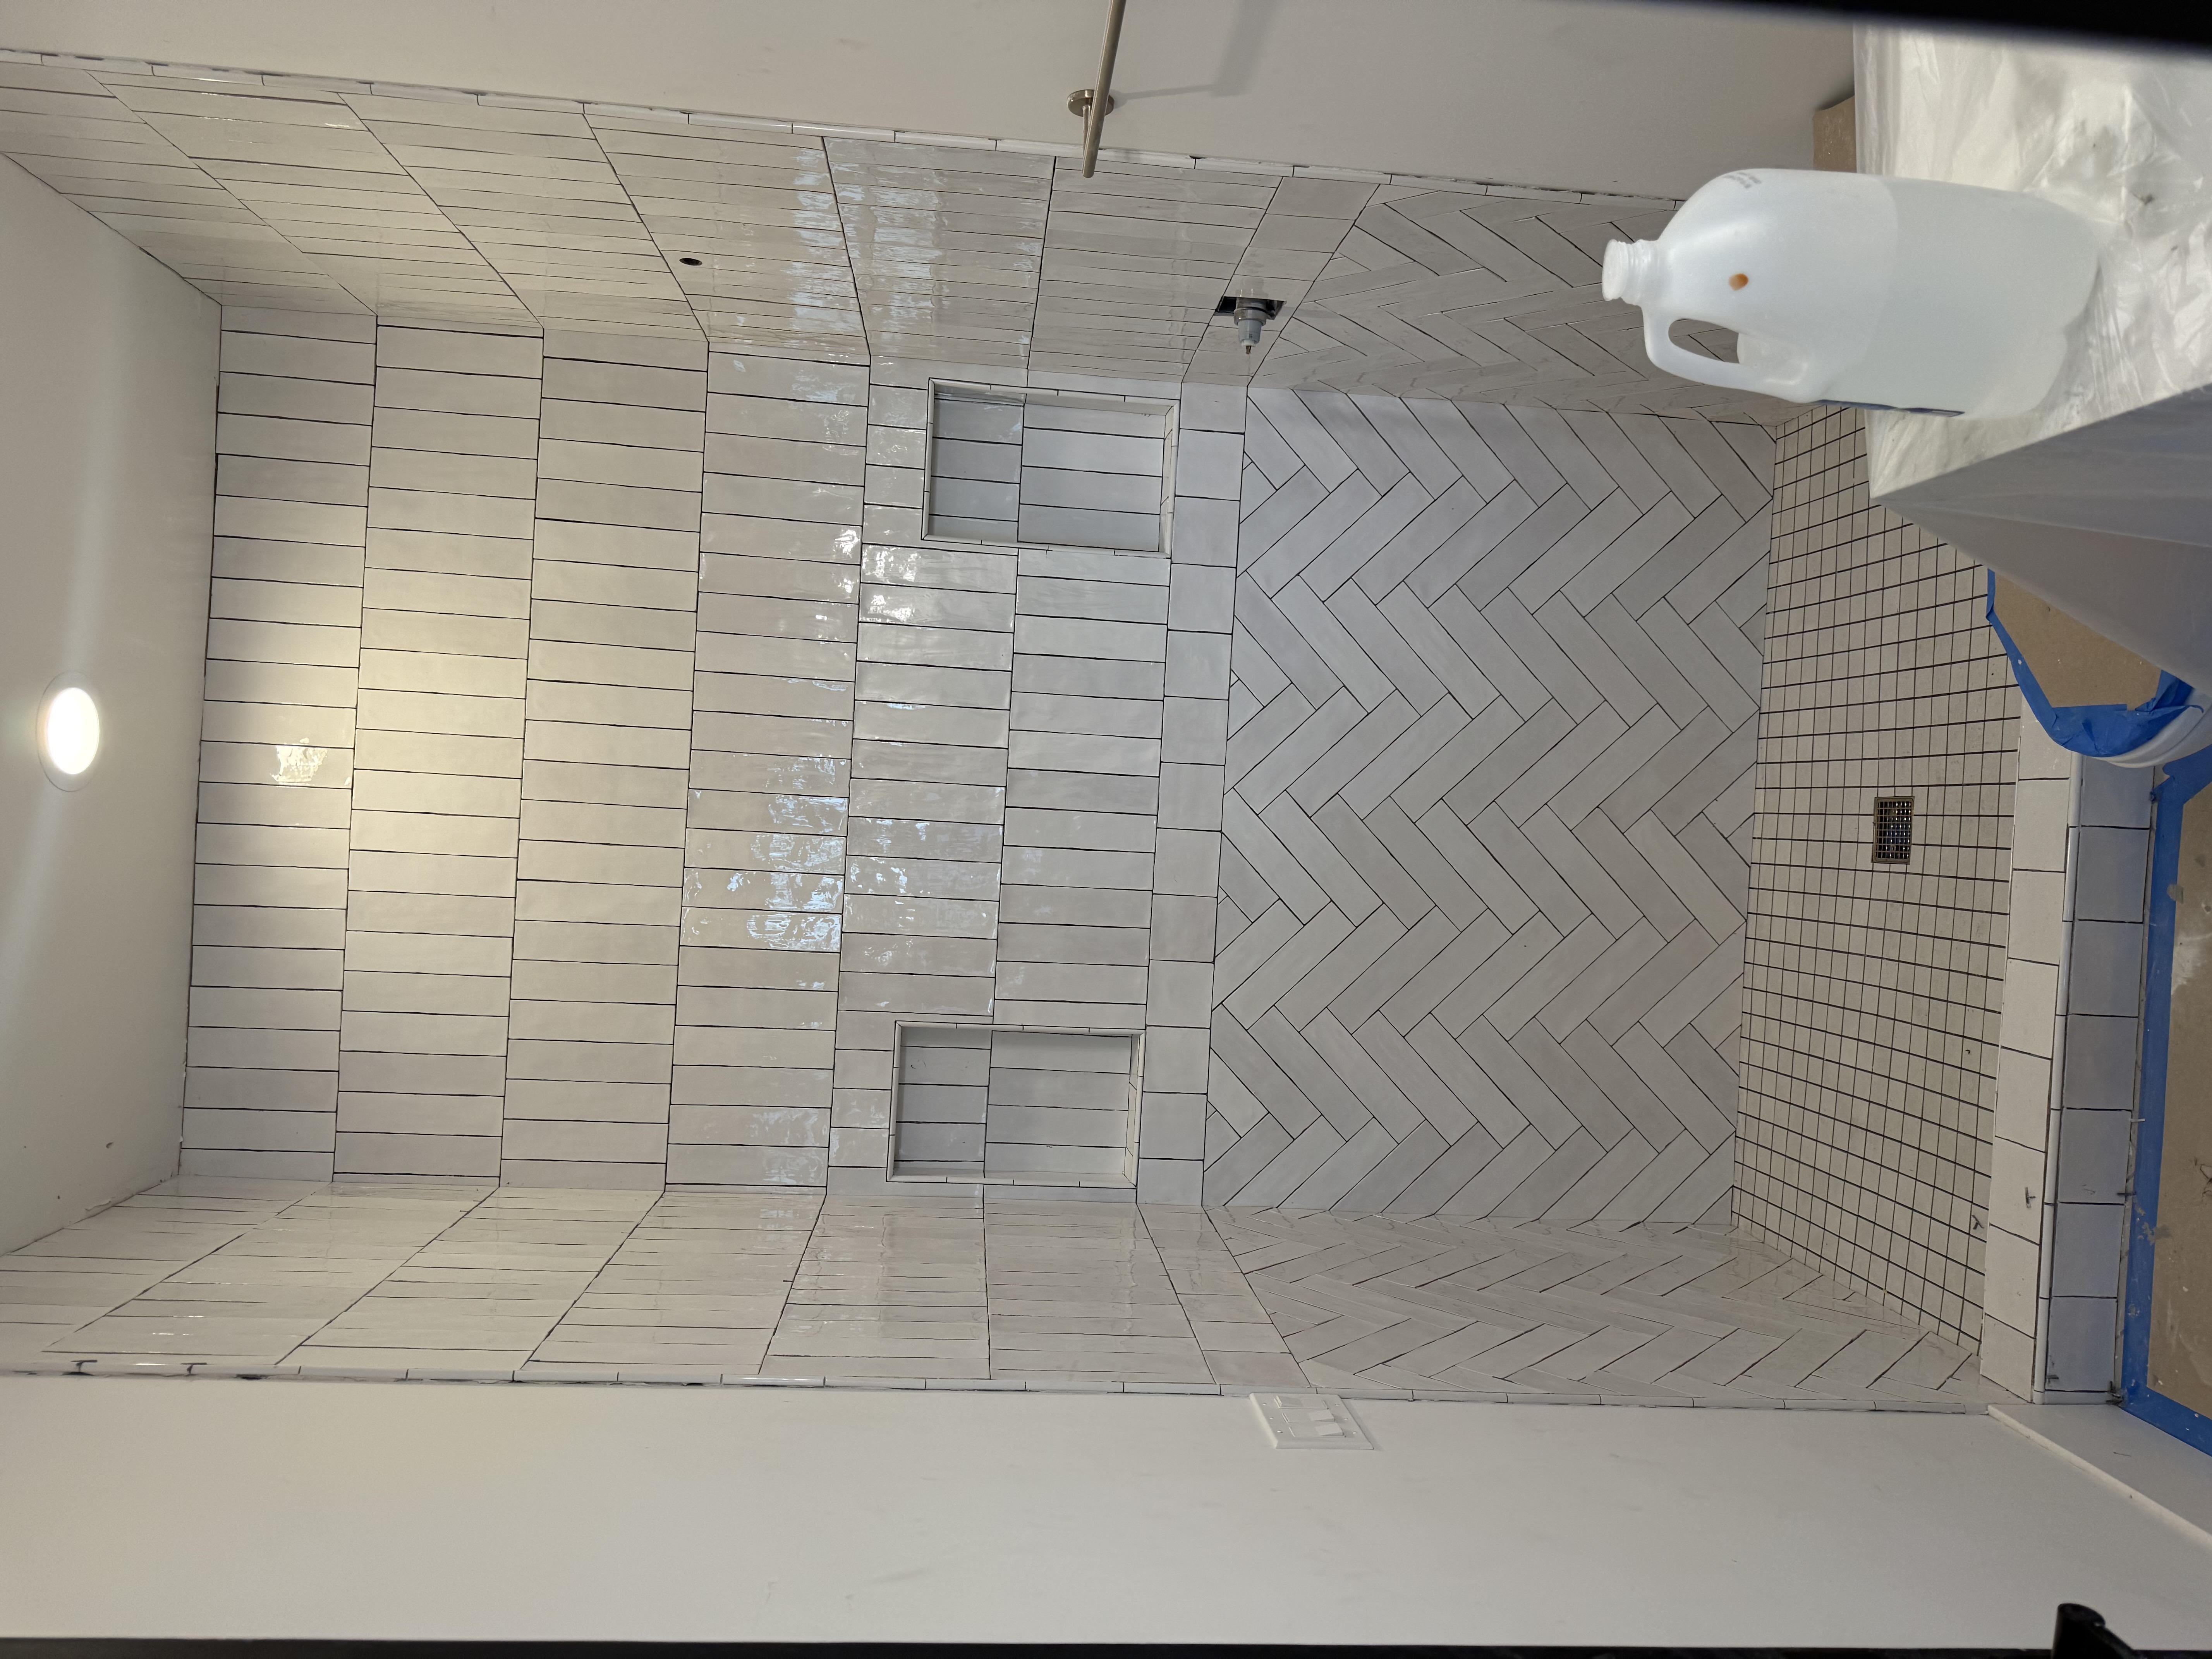
Grout Joint Sizing
Grout joints are not just decorative. Their width is determined by the quality and type of tile you choose. TCNA standards provide specific guidance:
- Rectified tile (precision-cut edges): Can be installed with grout joints as small as 1/16 inch. This creates the tight, seamless look that most homeowners want.
- Calibrated (non-rectified) tile: Requires a minimum 1/8 inch grout joint. These tiles have slight variations in size that wider joints accommodate.
- Natural stone: Typically 1/8 inch minimum, though the specific stone and cut quality may dictate wider joints.
- Handmade or rustic tile: Often requires 3/16 inch or wider joints to account for irregular edges.
This is why we always tell homeowners: the tile you choose determines the grout joint size, not the other way around. If a contractor promises 1/16 inch joints on a low-quality, non-rectified tile, they are either going to deliver a bad result or they do not understand the standard. We will always be honest about what your tile selection allows.
Movement Joints and Expansion Gaps
Every tile installation moves. Concrete slabs expand and contract with temperature changes. Wood subfloors flex under load. Buildings settle over time. TCNA standards require movement joints (also called expansion joints) to accommodate this movement and prevent cracking.
The standards specify:
- Perimeter joints: A gap around the edges of every tiled surface where it meets walls, cabinets, or other fixed objects. This gap is filled with flexible silicone caulk, not grout.
- Change-of-plane joints: Wherever two tiled surfaces meet at an angle -- like a wall meeting a floor, or two walls meeting at a corner -- the joint must be filled with silicone, not grout. Grout is rigid and will crack at these transitions.
- Field movement joints: In larger installations, movement joints must be placed at regular intervals through the tile field -- typically every 20 to 25 feet in each direction for interior installations.
We use Mapei Mapesil T Plus 100% silicone at every change-of-plane joint, color-matched to the grout so it blends seamlessly. This is a detail many contractors skip entirely, using grout everywhere because it is faster. Six months later, those grout lines crack and the homeowner thinks the installation was defective. It was -- just not in the way they expected.
Leveling Tolerance (Lippage)

Lippage is the term for when one tile edge sits higher than the adjacent tile, creating an uneven surface. TCNA standards define maximum acceptable lippage based on the grout joint width:
- For grout joints 1/16 inch or less: Maximum lippage of 1/32 inch.
- For grout joints wider than 1/16 inch: Maximum lippage should not exceed the lesser of 1/32 inch plus the actual grout joint width divided by a standard allowance.
In practical terms, this means your finished tile surface should feel flat and even when you walk across it or run your hand over it. No tripping hazards. No tiles that catch your toe. No edges that stick up.
Achieving this requires a leveling system. We use Rubi or QEP leveling clips and wedges on every single floor and wall installation. The system mechanically pulls adjacent tiles flush with each other while the thinset cures. It is an added step that adds time and material cost -- but it is the only way to guarantee a truly flat finish, especially with large-format tile.
What Happens When Contractors Skip These Standards
Every standard listed above exists because someone, somewhere, learned the hard way what happens without it. Here is what homeowners actually experience when their contractor cuts corners:
- Water damage behind shower walls. Without proper waterproofing, moisture penetrates the wall cavity. You will not see it for months or even years. By the time you notice water stains on the other side of the wall, the framing may already be rotting and mold may be growing behind the tile. Repair costs can run $5,000 to $15,000 or more -- far exceeding the cost of doing it right the first time.
- Cracked tiles and grout. Without proper substrate prep, movement joints, and leveling, tiles crack under stress. Without adequate thinset coverage, tiles pop off the wall. Without proper grout joint sizing, grout lines crumble and fall out.
- Mold growth. Inadequate waterproofing and poor drainage create moisture traps that become breeding grounds for mold. In Arizona, our hot climate can accelerate mold growth once moisture is present, even in our dry air.
- Warranty issues. Most tile manufacturers and material suppliers require TCNA-compliant installation for their warranties to be valid. If your shower fails and the manufacturer determines the installation did not follow TCNA standards, your warranty claim will be denied.
- Decreased home value. A poorly installed tile job is immediately obvious to any experienced home inspector. If you plan to sell your home, a substandard tile installation can become a negotiating point that costs you thousands.
How Level Up Tile Follows TCNA and NTCA Standards
At Level Up Tile, TCNA standards are not something we aspire to -- they are the minimum baseline for every project we take on. Here is what that looks like in practice on every job:
- Schluter Kerdi waterproofing on every shower pan, with FloFX drain. HydroBlok foam boards on all shower walls -- a fully waterproof system. 100% waterproof verified before tile. Color-matched silicone at every change of plane, not grout that cracks over time.
- Proper substrate preparation on every project. We grind uneven concrete. We apply self-leveling compound where needed. We install crack isolation membrane over existing cracks. We never tile over drywall in wet areas.
- Back-buttering and full thinset coverage on every tile, with Schluter All-Set white thinset. We check coverage by periodically pulling tiles to verify adhesion.
- Appropriate grout joint sizing based on the actual tile being installed. 1/16 inch on high-quality rectified tile. 1/8 inch on standard calibrated tile. If a tile cannot meet our standards for tight joints, we will tell you upfront.
- Mapei Mapesil T Plus silicone at every change-of-plane joint, color-matched to the grout.
- Rubi or QEP leveling system on every floor and wall. Zero lippage tolerance.
- Premium materials only. Mapei grout. Laticrete sealers. Schluter systems. Tile sourced through our partners at The Tile Shop, Arizona Tile, Emser Tile, Floor & Decor, and FloFX. We never substitute cheaper alternatives.
We will not install tile that does not meet the quality threshold for the finished result we stand behind. If the tile you picked will not hold up to tight joints or a flat finish, we will tell you before the job starts -- not after.
How to Ask Your Contractor About TCNA Standards
You do not need to become a tile expert. But asking a few specific questions will quickly reveal whether your contractor knows what they are doing. Here are the questions that matter:
- "How do you waterproof a shower?" -- Listen for specific products and methods. A professional will name their membrane system (Schluter Kerdi, Laticrete Hydro Ban, RedGard, etc.) and describe their process. If the answer is vague or they say the tile itself is waterproof, walk away.
- "What substrate do you use on shower walls?" -- The answer should be cement backer board, foam board, or another TCNA-approved substrate. If they say drywall, that is a disqualifier.
- "Do you back-butter large-format tile?" -- For tiles over 15 inches, the answer must be yes. If they do not know what back-buttering is, they are not qualified to install large tile.
- "What grout joint size will you use, and why?" -- A knowledgeable contractor will explain that grout joint width depends on the tile quality and whether it is rectified. If they just say "whatever you want," they may not understand the technical requirements.
- "Do you use a leveling system?" -- The answer should be yes, with a specific system named. Manual eyeballing is not adequate for modern tile installation.
- "What goes at the corners and where the wall meets the floor -- grout or caulk?" -- The correct answer is caulk (silicone). If they say grout, they are not following TCNA standards for movement joints.
- "Are you familiar with TCNA guidelines?" -- A professional contractor will know immediately what you are talking about. If they look confused, that tells you everything you need to know.
The Bottom Line
Tile installation is not just about making something look good on the surface. It is a system of interlocking components -- waterproofing, substrate, adhesive, tile, grout, and sealant -- that must all work together according to proven standards. When any single component is skipped or done incorrectly, the entire system is compromised.
TCNA standards exist to protect you. The contractors who follow them are the ones who understand that a beautiful tile job starts long before the first tile goes on the wall -- and that the work nobody sees matters just as much as the finished surface.
At Level Up Tile, we have built our entire business on this principle. Every project gets the same premium treatment, the same attention to standards, the same refusal to cut corners. It is the only way we know how to work -- and it is the reason homeowners across Peoria, Scottsdale, and the greater Phoenix area trust us with their homes.
Ready to Work With a Contractor Who Does It Right?
Get a free, no-pressure consultation. We will visit your home, see your space, and give you one honest quote -- with TCNA-compliant installation on every project.